Overview
Dabbing has taken the cannabis community by storm in recent years, mainly due to the rise of marijuana-based concentrates.
As of June 30th, 2017, the state of Montana started allowing medical marijuana patients to purchase and possess cannabis concentrates, resulting in an increase of concentrate interest and the availability of new technology within the state.
![]()
Here we are in 2019, and only recently are people within Montana catching on that dabbing is an option.
To a first-timer, the dab process can seem complicated and downright intimidating. Concentrated THC? Dab Rig? Blow Torch? Huh? Am I back in science lab? Am I welding? It’s not that complicated, we promise.
In this article, we’re going to break down the dab process for you with an overview of the basic materials and most importantly-- a dabbing tutorial.
Once you see how straightforward it is, your understanding and appreciation of cannabis extracts will grow and only improve your overall experience with concentrates in Montana.
Curiosity and intrigue probably got you here, the knowledge of how to dab correctly, and of what is possible, is what will probably turn you into an enthusiast.
Tools of The Trade
Let’s level up together, starting with the tools of the trade:
-
-
-
-
-
-
-
-
- Dab rig
- Titanium, ceramic or quartz nail
- Glass or quartz dome / carb cap
- Mini blowtorch
- Titanium Dab tool
- Dab mat
- Cannabis concentrate of choice
-
-
-
-
-
-
-
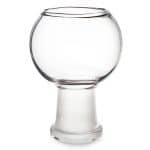
The Dab Rig
First things first, you need a dab rig. Never heard of it? At first glance, many people think it’s a bong-- excuse me-- water pipe. This is the most basic and central piece for the whole operation. You can’t build a sturdy house without first laying a good foundation. You cannot dab properly without a dab rig.
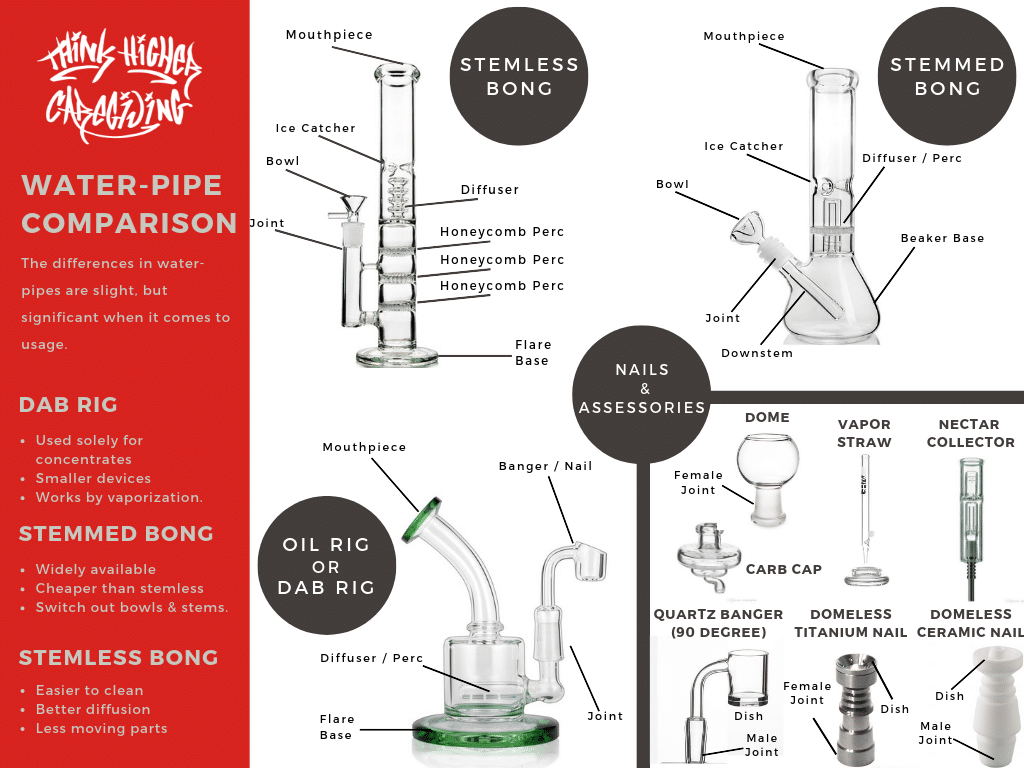
The dab rig is composed of a glass apparatus, nail, and dome. Unlike a bong-- ahem-- water pipe, dab rigs need more juice than the standard Bic lighter can provide. For this swank set up you will need to opt for a blowtorch instead. There is just no heating a ceramic nail to red-hot readiness without one. Macho men be warned: mini blowtorches are preferable.
We generally do not recommend that you try to build your own dab rig. Because we’re using blowtorches here, the dab rig needs to be able to sustain high temperatures… please do not make this a DIY trip to the burn unit.
Nail / Banger
The nail, sometimes referred to as a banger, has to be able to withstand temperatures upwards of 1,000 degrees, so it is absolutely imperative that you secure a quality nail that is made from quartz, titanium or ceramic. Think Higher prefers quartz, but refer to this great article from Leafly which breaks down the pros / cons to the different nails to figure out which type of nail will work best for you.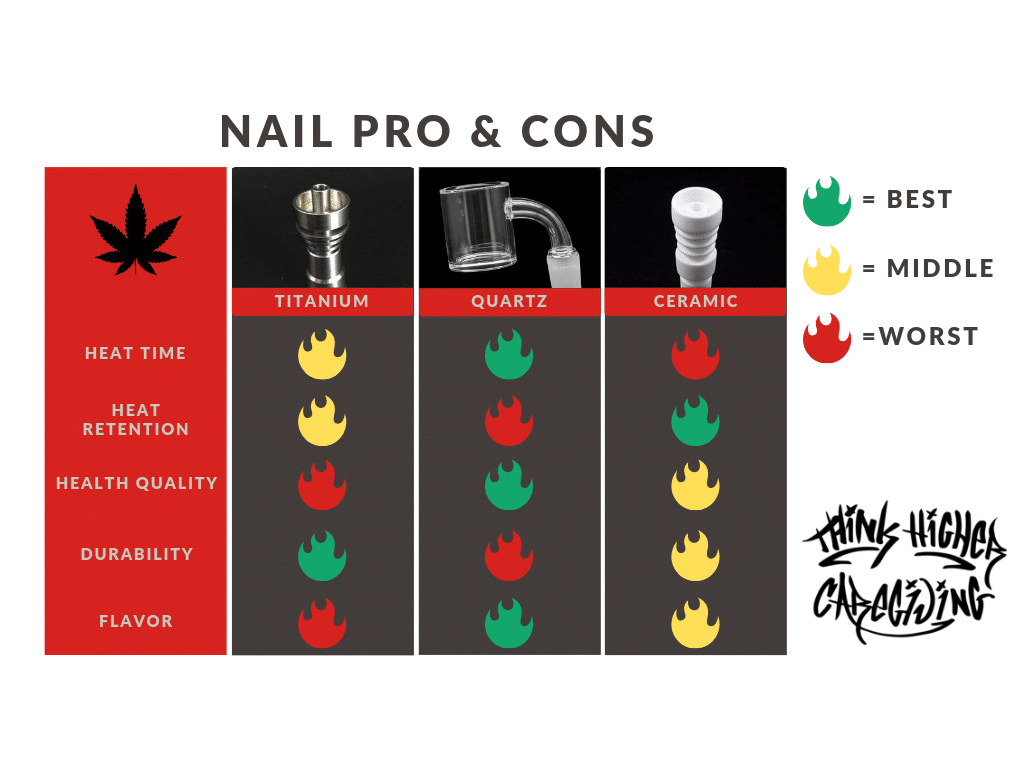
Dome / Carb Cap
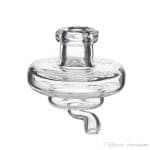
The dome, sometimes referred to as a carb cap, portion of the dab rig is pretty straightforward.
Domes typically come in glass, quartz, or metal as a standard. You need it to cap the nail and trap every bit of smoky/vaporized THC for inhalation.
The capping allows a lower vaporization point to be achieved. As you cover, a low pressure environment is created while inhaling, essentially making a vacuum environment.
To be a true avid dabber, a carb cap is an absolute must.
The Dab Tool
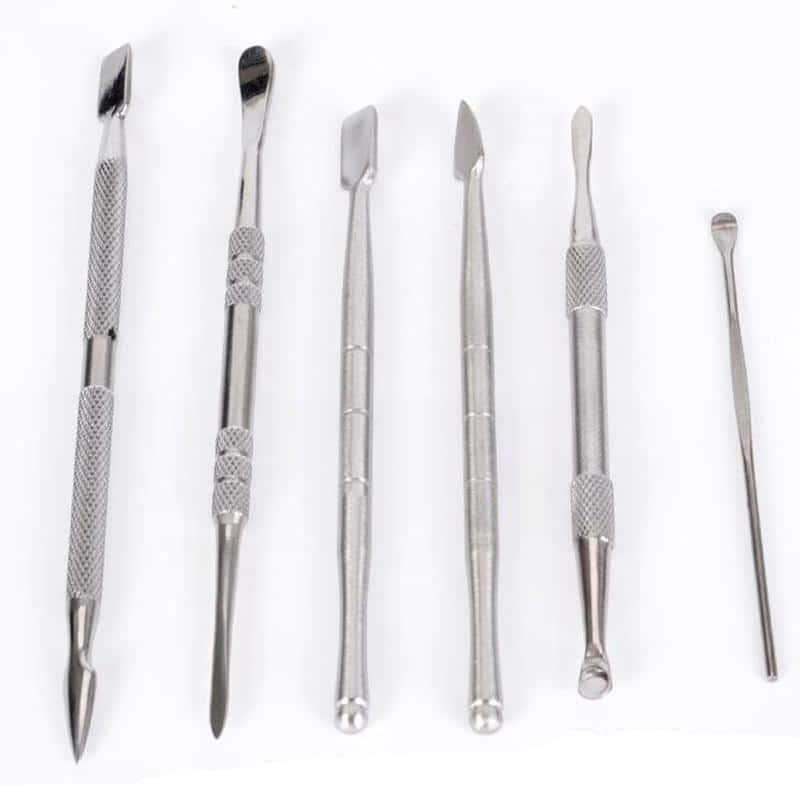
The dab tool is a long, slender titanium or glass pick that helps you to place your concentrate on the hot nail.
This tool is all about your safety. It would be dangerous to put your hand within an inch of something so hot.
Simple, right? No touchy. Use dab tool.
The Blowtorch
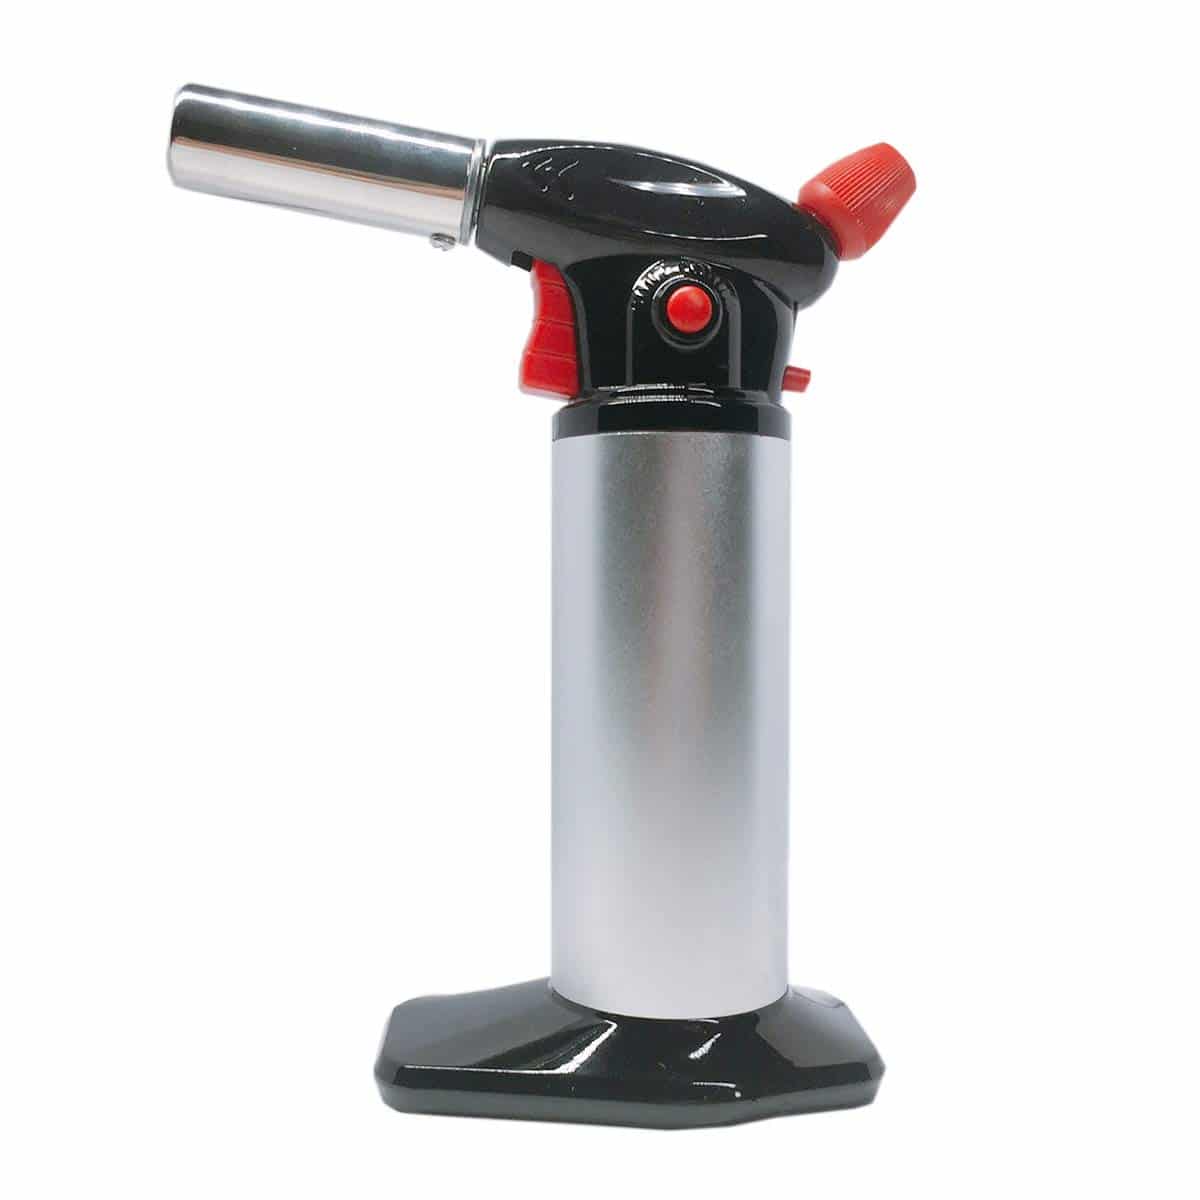
Without complicating things, blowtorches come in a wide variety of sizes, strengths, and compatible gases. Normally, a handheld blowtorch that uses butane is sufficient.
Most people prefer small blowtorches for their simplicity, safety, and size. Who wants to keep a giant blowtorch in their house? Nah.
E-Nails
Using a blowtorch to heat up your nail is efficient, but you won’t be able to accurately gauge the heat of the nail on your own, no matter how experienced you are. You know you want a hot & heavy the first time
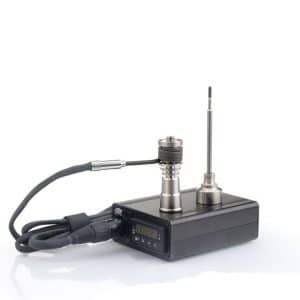
around? Or do you prefer the rich flavor profile afforded by low temp dabs? You need an electronic nail.
E-nails are an incredibly convenient tool to help you accurately heat the nail to your desired temperature. To use it, manually input your temperature setting and attach the coils to the nail on your dab rig. The coils heat the nail to the exact degree that you specify on the control panel.
You can find a wide variety of e-nails online for different prices, so it’s up to you what kind of experience you would like, and what you are willing to pay for. Keep in mind, like normal nails, e-nails will vary based on the material the e-nail is made of.
Why an E-Nail over a regular nail?
Most cannabinoids vaporize within the 300F range. Similar terpenes vaporize within a corresponding temp range. By setting your e-nail to these specific temperatures, you can experience terpenes in their purest forms.
Without an e-nail, you will have to guesstimate with a blowtorch. More likely than not, you will lose the opportunity to experience the full flavor available in different THC concentrates.There are many helpful charts which show the vaporization points of various terpenes and cannabinoids.
It is important to note however, as stated by Dale Gieringer, President of Cal NORML, “The vaporization point at normal atmospheric pressure appears to be unknown.”
We will dive into the details of optimal temperatures a little later in the article, but first review the pros and cons between regular nails and e-nails.

Dabbing Tutorial
And now, for our Dabbing Tutorial
Compile your tools and materials; it’s time to put theory to practice.
Step One
Setup your dab rig by installing the nail into its slot. Turn on your blowtorch and aim it directly at the nail so the flame hits the nail.
Begin heating it up, keeping the torch moving around the nail to heat evenly and once the nail appears red-hot, turn off the flame.
Allow the nail a cool-down period for 20-40 seconds. The cool-down period allows you to fine-tune rough temperatures.
Because dabbing allows you to fine-tune your temperature, you will be able to release an abundant amount of terpenes with each dab. The temperature the dab is subjected to will determine whether you are inhaling smoke or vapor.
Hot & Heavy Dabs
Heating the nail and consuming your concentrates at high temperatures will provide a heavier, thicker, and harder hitting dab. This type of dab usually leaves you coughing, and provides a “stonier” feeling. We call these “hot & heavy” dabs.
Hot & heavy dabs are normally achieved at temperatures above 600 degrees F but below 900 degrees F. This heat range will cause scorching of some terpenes, notably the sweeter ones, producing a harsher hit as smoke is produced. Hence—“hot & heavy.”
Low Temp Dabs
Oppositely, heating and consuming your dab at a lower temperature, referred to as “low-temp dabs”, will produce a more flavorful, richer taste, that is smoother on the lungs. Low temp dabs are generally considered between 315-400 degrees F.
A quality meet between the two can occur around 450-600 degrees F, producing a hybrid of vapor and smoke.
Note that before you begin, you should always ensure the area is clear of anything combustible or flammable. Dabbing is an enjoyable method for smoking cannabis, but please, safety first.
Step Two

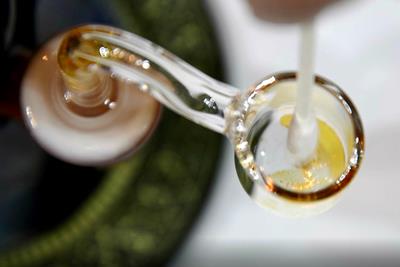
Use your dab tool to portion off the amount of concentrate you would like to use; generally keep the portion smaller than a pea so that it doesn’t fall off the nail.
Place your portion on the nail and begin stirring it in a clockwise motion.
Step Three
Begin inhaling slowly. At this point, your concentrate is just starting to vaporize. As you watch the concentrate disappear, set the dab tool down, cap your dome, and inhale.
Take it easy so you can acclimate to the process.

Unlike smoking cannabis flowers, it is suggested not to try and hold your hits inside your lungs, as the smoke will expand. Let it out, exhaaaaaaale.
It is wise to take a few pulls, spinning your dome back and forth to allow excess air to enter in a controlled manner.
Finally, remove the dome fully to inhale the remainder of smoke. Note that the nail may still be extremely hot and have excess smoke billowing from the banger.
Step Four
Once the dab is completed, it is extremely important to clean the bucket of the nail (where you put the concentrate) right after dabbing in order to keep the nail fresh. This standard method is what is called the "Q-Tip Tech".
The Q-Tip tech is simple -- grab a cotton swab and swirl the q-tip around the freshly hit nail to soak up leftover concentrate. Use both sides of the q-tip, getting the corners and creases to wipe out any left over liquid.
This will avoid unvaporized concentrate from burning when heating for the next dab and keeping the lifespan of the nail.
Keep in mind that there is a temperature sweet spot for the q-tip tech. If the nail becomes to low in temperature (waited to long after taking the dab) then the cotton swab fibers can be pulled off into the left over concentrate in the banger.
Never place a cotton swab on a nail that has just been heated without a cooldown period of at least 20-40 seconds.
That’s it-- you’ve just completed your first dab!